测试适度by @我
This guide will walk you through the steps required to build and publish aarch64 Docker images for Go projects. This guide assumes you have a basic understanding of Go and Docker, and that you have Go and Docker installed.
Setup a Go Project
First we setup a go.mod file for our project. The module file defines the project namespace and dependencies:
module github.com/octocat/hello-world
Next we create a simple Go program. For the purpose of this guide we create a simple http server that responds to an http request with hello world.
|
|
Use the go tool to compile our program to a standalone binary file, and then execute the binary to start the server on port 8080.
$ go build
$ ./hello-world
Use cURL to verify the server is running and responding to requests:
$ curl http://localhost:8080
hello world
Setup a Dockerfile
Next we are ready to build a Docker image using a Dockerfile. A Dockerfile is a text file that has a series of instuctions and commands for creating the image. We create the following Dockerfile:
|
|
FROM Instruction
The FROM instruction set the base image for subsequent instructions. This sets an aarch64 Alpine Linux image as the base.
|
|
EXPOSE Instruction
The EXPOSE instruction informs Docker that the container listens on the specific port at runtime. This exposes port 8080.
|
|
ADD Instruction
The ADD instruction copies the binary to the target directory in the image. This adds the hello-world binary to the image.
|
|
ENTRYPOINT Instruction
The ENTRYPOINT instruction configures the default command that is executed when the container starts. This is configured to execute the hello-world binary.
|
|
Build and Publish the Image
The next step is to build our Docker image. But first we need to re-compile our binary file for the target operating system and architecture. If you are compiling the program on macOS or Windows, or any amd64 machine, it will not execute inside an aarch64 Linux container environment.
Build the executable for the target operating system:
$ CGO_ENABLED=0 GOOS=linux GOARCH=arm64 go build
Build the Docker image:
$ docker build -t hello-world .

Sending build context to Docker daemon  7.342MB
Step 1/4 : FROM arm64v8/alpine
latest: Pulling from library/alpine
9d48c3bd43c5: Pull complete
Digest: sha256:72c42ed48c3a
Status: Downloaded newer image for alpine:latest
 ---> 961769676411
Step 2/4 : EXPOSE 8080
 ---> Running in 2f236d12e89b
Removing intermediate container 2f236d12e89b
 ---> d090ee077728
Step 3/4 : ADD hello-world /bin
 ---> bc936808d504
Step 4/4 : ENTRYPOINT [ "/bin/hello-world" ]
 ---> Running in 3abd9fbc427e
Removing intermediate container 3abd9fbc427e
 ---> 37fb6bd7aafe
Successfully built 37fb6bd7aafe
Successfully tagged hello-world:latest
Create and run a Docker container using our image. Note that we expose port 8080 inside the container and map to port 8080 on the host.
$ docker run -p 8080:8080 hello-world
Continuous Integration
Once our project is ready and is pushed to GitHub we can automate the build and test process using continuous integration.
In this section we configure Drone, an Open Source continuous integration system, to automatically build and test our code every time we push to GitHub. You can install Drone on your own servers, or you can use the free Cloud offering.
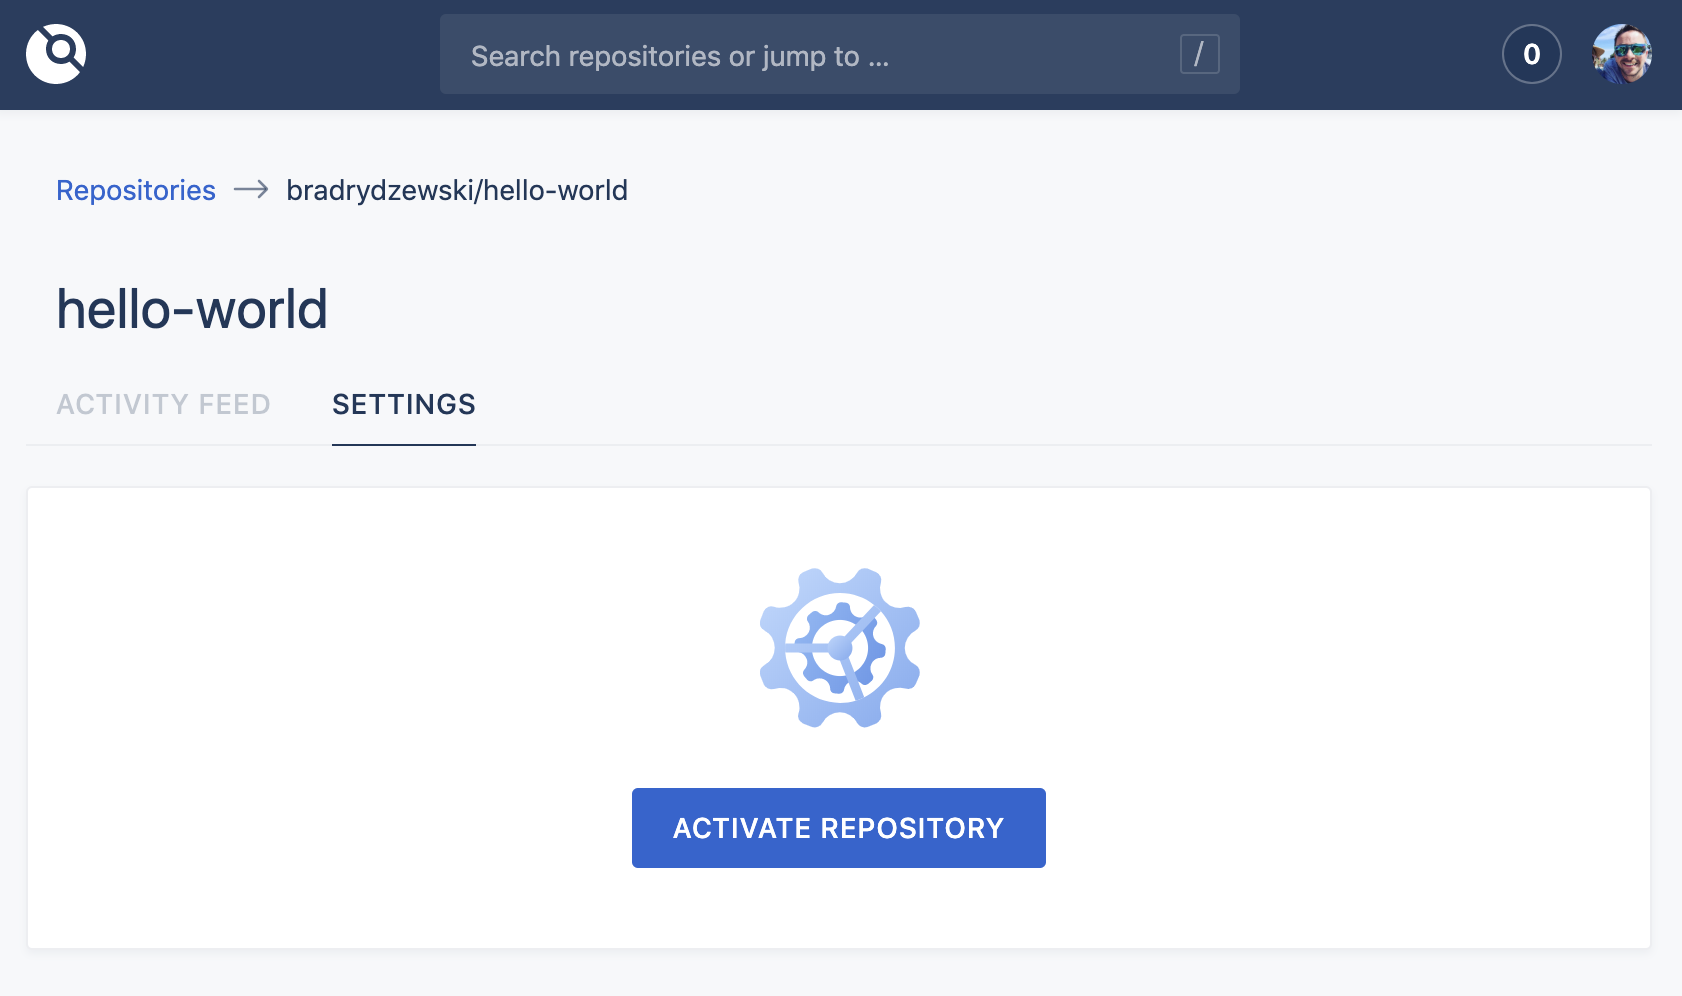
Activation
Fist, login into Drone and activate your repository:
Configuration
Next, define a Continuous Integration Pipeline for your project. Drone looks for special .drone.yml file within repositories for the Pipeline definition:
|
|
In the above example we define our Pipeline steps as a series of shell commands executed inside Docker containers.
The platform Section
Defines the target operating system and environment.
|
|
The name Attribute
Defines the name of the Pipeline step.
|
|
The image Attribute
Defines the Docker image in which Pipeline commands are executed.
|
|
The commands Attribute
Defines the Pipeline commands executed inside the Docker container.
|
|
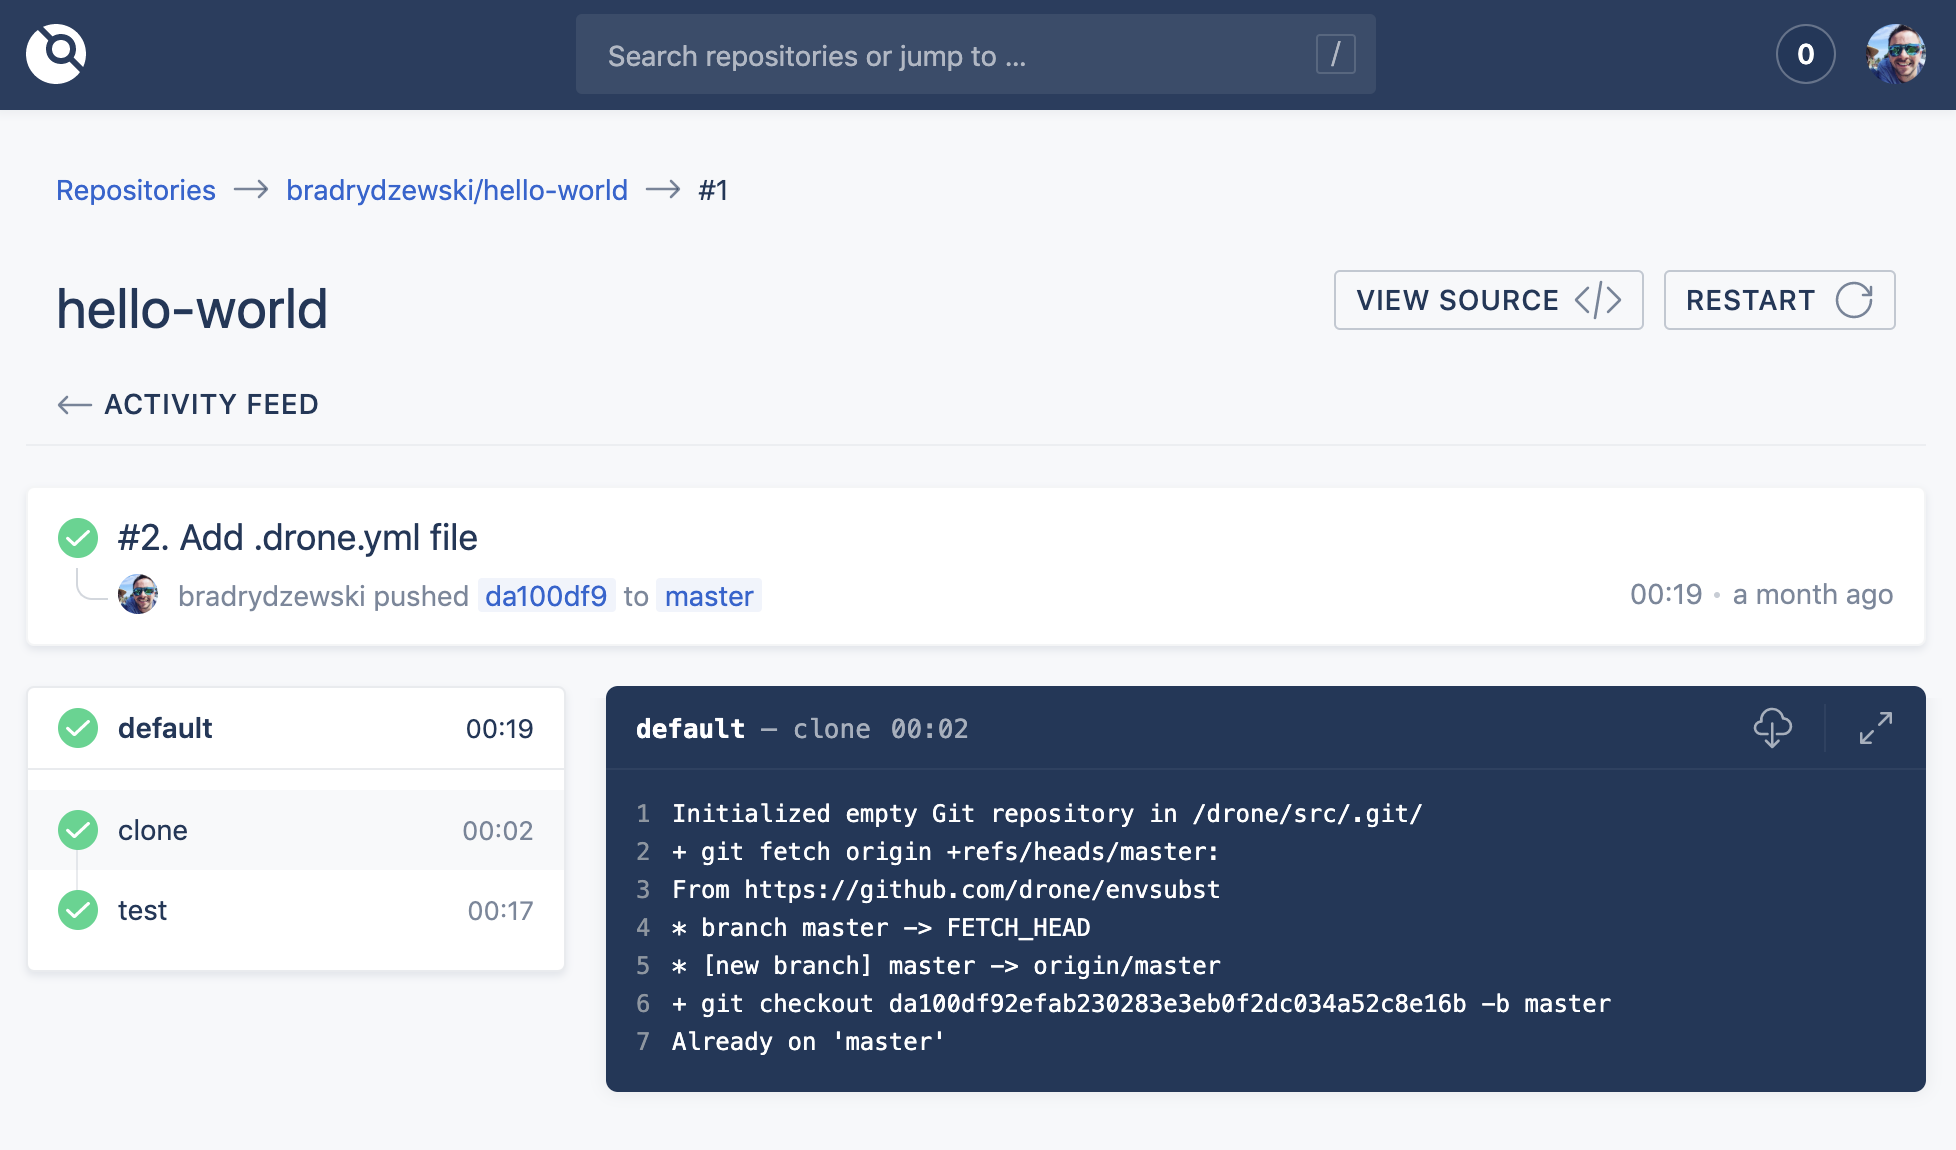
Execution
The Pipeline will execute every time we push code to our repository. We can login to Drone and inspect the Pipeline results:
Continuous Delivery
The final step is to automatically build and publish a Docker image to DockerHub. In order to publish and image to DockerHub we need to provide our credentials.
Secrets
For security reasons we do not want to store our credentials in our yaml. Instead you can securely store your secrets in the Drone database, adding your docker username and password via the repository settings screen.

Settings
Drone has a robust plugin system, including a plugin to build and publish images. Add a new step to the Docker Pipeline and configure the Docker plugin.
|
|
The image Attribute
Defines the image used to build and publish the Docker image.
|
|
The username Attribute
Provides the username used to authenticate with the Docker registry, source from the named secret.
|
|
The password Attribute
Provides the password used to authenticate with the Docker registry, sourced from the named secret.
|
|
The repo Attribute
Provides the Docker repository name.
|
|
Next Steps
Now that you have Drone automatically building and publishing Docker images you can add more advanced Pipeline steps. For example, you can automatically update your Kubernetes pods to use your new images, or you can send Slack notifications to your team every time your Pipeline completes.